Sunday, July 31, 2011

Red Velvet Brownies

I have had an insatiable sweet tooth lately.  But, I do not bake.  Baking is precise.  Not only that but you have to follow the steps exactly, you have to measure everything, and it's just not my cup of tea.  But my fantastic husband, Dusty, does bake.  Dusty is lots of things, patient, kind, supportive, as well as being a great baker!  So he's making a guest appearance on the blog with red velvet brownies.  I've been searching for a good red velvet brownie recipe for the better part of the week.  The initial recipe that sent me on the hunt had a good brownie base and had a cream cheese icing.  I don't know why, but it just didn't scream yum to me.  So I went searching some more.  Other recipes just had a stand alone brownie with lots of red food dye.  Again, just wasn't what I was looking for.  Then this morning, I found it!  This recipe had a delicious, cakey red velvet brownie base.  And it was swirled with cream cheesyness goodness (yes, that's a word).  I showed Dusty the recipe and declared that he just HAD to make them for me.  I ran out to get cream cheese and red food dye while Dusty looked over the recipe.  Lots of measuring, mixing, pan-greasing, and layering ensued while I watched from the sidelines giving "helpful suggestions" all along the way.   I am a horrible back-seat baker.  :(  We omitted the walnuts from the original recipe and cooked them for 33 minutes rather than the 30 minutes.  Me & Dusty and the boys dove into these as soon as we snapped the pictures and they are so yummy!  If red velvet is a favorite of yours, you will want to try these brownies. 

And I got to thinking about a few questions... Do you have split cooking/baking responsibilities in your house?  Do you prefer cooking over baking too? 

Ingredients

  • 1 tablespoon unsalted butter, for pan

Red Velvet Brownie Layer:

  • 1 stick unsalted butter
  • 1 cup sugar
  • 1 teaspoon vanilla extract
  • 1/4 cup cocoa powder
  • Pinch salt
  • 1 tablespoon red food coloring
  • 1 teaspoon vinegar
  • 2 eggs
  • 3/4 cup all-purpose flour
  • 1/4 cup chopped toasted walnuts

Cream Cheese Layer:

  • 8 ounces cream cheese, softened
  • 1/4 cup sugar
  • 1 egg
  • 1/8 teaspoon vanilla extract
  • Special equipment: 8 by 8-inch baking pan

Directions

Preheat the oven to 350 degrees F.

Butter an 8 by 8-inch baking pan, and set aside.

Brownie layer: In a saucepan on medium heat melt the butter. Remove the butter to a large bowl and add the sugar, vanilla, cocoa powder, salt, food coloring, and vinegar, in that order, mixing between additions. Whisk the eggs in a small bowl and stir it into the cocoa mix. Fold in the flour until lightly combined. Stir in the walnuts and pour the batter into the prepared baking pan, saving 1/4 cup of the batter for the top.

Cream cheese layer: Blend together the cream cheese, sugar, egg, and vanilla in a medium bowl. Gently spread the cream cheese layer on top of the brownie batter in the pan. Dollop the remaining brownie batter over the cream cheese layer. Using a skewer or the tip of a knife, drag the tip through the cream cheese mixture to create a swirl pattern. Bake the brownies for 30 minutes. Remove to a cooling rack and allow them to cool completely before cutting.

http://www.foodnetwork.com/recipes/sunny-anderson/red-velvet-swirl-brownies-recipe/index.html

Saturday, July 30, 2011

Berry compound butter

This is the recipe that launched this blog.  I read about berry compound butter on Pioneer Woman's site and it was all I could think about all week.  I had some strawberries in the fridge and I keep thinking about yummy strawberry butter melting over biscuits, french toast, waffles, pancakes, the list could go on and on.  I planned on making it during the week, but the week quickly got busy, and before I knew it, it was Saturday.  Which is just fine in my world because Saturdays are typically a little slower, a little calmer, a little bit special.  So I woke up on Saturday morning and made french toast (using some inspiration for Pioneer Woman's recipe) and this strawberry compound butter.  Since it's just my little family, I modified the recipe to include one stick of butter and about 1/3 cup of strawberries.  Let me tell you, it was everything I had hoped it would be and more!  So grab a stick of butter and some leftover berries lying around your house.  You definitely do not want to pass up this recipe. 

Ingredients

  • 1 pound Unsalted Butter, Softened
  • ½ cups Raspberries
  • ½ cups Blackberries
  • 1 loaf Crusty Bread: Baguette, French Loaf, Etc.
  • 4 whole Egg Yolks
  • 2 cups Half-and-half
  • 1 Tablespoon Sugar
  • 2 teaspoons Vanilla
  • Zest Of One Lemon
  • Maple Syrup For Serving
  • Sifted Powder Sugar, For Serving (optional)

Preparation Instructions

Make the berry butters: in separate batches, whip 2 sticks of butter at a time on high using the whisk attachment. Switch to paddle attachment. Add either raspberries or blackberries. Turn mixer on low for only about five seconds, just long enough for the berries to begin to mix in/break up, but not so long that it turns into a mess. Clean mixer bowl and attachments and repeat with other kind of berry.
With each batch, turn mixture out onto a long sheet of plastic wrap set over a long sheet of foil. Use the wrap/foil to roll the butter into a cylinder: first seal the plastic wrap around the cylinder, then secure the foil around it. Twist the ends, gradually applying more pressure as you twist in order to make the cylinder taut.
Once it’s a nice, neat cylinder of foil, place into the freezer for 30 minutes in order to quickly solidify it, then transfer it to the fridge until you’re ready to use it. Butter should be nice and firm.
NOTE: You can add a little sifted powdered sugar to the butter to make more of a sweet spread for bread and muffins! For French toast, though, the maple syrup makes things sweet enough.
To make the french toast, cut bread into slices 1/2 inch thick. In a dish, mix together egg yolks, half-and-half, sugar, lemon zest and vanilla. Whisk to combine. Dip bread slices in mixture, coating both sides, then remove from dish and set aside. Repeat until all bread is coated.
Heat iron skillet or griddle over medium heat. Sizzle butter in the pan when hot. Cook French toast on both sides until golden brown, being careful not to burn.
Remove berry butters from fridge. Unwrap one end and cut slices. Lay one slice each onto each serving of French toast. Sprinkle with powdered sugar if desired, then drizzle with warm maple syrup.

Recipe from Pioneer Woman's website:  http://thepioneerwoman.com/cooking/2011/07/french-toast-with-berry-butter/

Thursday, July 28, 2011

Taco night

Tacos - yum!  Is there any other more perfect food than the taco?  I don't think so!  Beef tacos, fajita tacos, bean tacos, breakfast tacos, I could go on and on.  Eventually, I'm sure I will post recipes for all of my favorites here on my blog.  But tonight was beef taco night here in the Drosche house.  Tacos are quick and versatile.  And you can do a lot of different things with the leftovers. 

If tacos are my comfort food (which they are!!!), then packet taco seasoning was my security blanket.  I have to admit that I always used those little packets to make tacos.  But a few years ago, I was craving tacos but didn't have any seasoning packets in the house.   So I went searching online for recipes.  Come to find out those seasoning packets are mostly salt and little taco magic.  That night, I pulled different jars from my spice cabinets and made tacos from scratch.  My recipe has adapted over the years and to tell the truth, tonight was the first time I ever measured it out.  :)  These tacos have a little kick to them, nothing crazy, just some nice heat.  I love the way the beef is spicy and the sour cream cools everything down. 

When it comes to toppings, I used salsa, cheddar cheese, shredded lettuce, and sour cream.  But really, the options are truly endless.  I have to add that if you ask my mom, toppings have a very special order.  Cheese is always on top of the meat, so it can melt.  Next comes the lettuce and tomato.  Last is salsa and sour cream.  I always laugh when we eat tacos at my mom's house because my job is to line up the toppings in the "correct order."  So schedule a taco night with your family this week and enjoy!  Will you step out of our comfort zone and try something new from scratch?  Will you conform to taco topping order or try something new?  Post a comment and let me know.

Beef Tacos 
Ingredients:

1 lb ground beef (I use 93/7)
1/2 small onion, diced finely
2 cloves of garlic, minced
1 Tablespoon cumin
1 Tablespoon chili powder
1 pinch dried oregano
salt & pepper to taste
1 cup water

Instructions:
1.  Brown ground beef in a large skillet over medium high heat with onion and garlic.
2.  Drain grease (if any).
3.  Put beef/onions/garlic back in the pan.
4.  Add cumin, chili powder, oregano, salt, & pepper.  Allow to cook for a minute or two.  (This is an important step and helps develop the flavors of the spices)
5.  Add water and simmer for about five minutes
6.  EAT!!!!

Tuesday, July 26, 2011

Potato skins

Okay - so don't think that it hasn't escaped me that the title of my blog is Dinner Chronicles and I've yet to post a single dinner recipe.  Truth be told, most of our meals the last couple of days have come from a box or a jar.  Sad, but true!  Oh well, there's always those seasons.  :)

But I just have to share this recipe for potato skins.  I order these occasionally when I'm eating out.  I've even ordered a Tex-Mex version at La Finca that's to die for.  I had a ton of potatoes in my house and I was looking for ways to use them up.  Just a quick tip - don't skimp on the first baking.  Make sure they're cooked all the way so it's easier to scoop out the potato wihtout messing up the skin.  Dusty and I ate way too much of these but they were so delicious!  What's your favorite appetizer?  What do you do to use up extra potatoes?  I'd love to hear from you and in the meantime, give these yummy potato skins a try. 


Potato Skins

Ingredients

  • 6 small to medium sized russet baking potatoes (total 3 pounds)
  • Olive oil
  • Canola oil
  • Kosher salt
  • Freshly ground pepper
  • 6 strips of bacon
  • 4 ounces grated cheddar cheese
  • 1/2 cup sour cream
  • 2 green onions, thinly sliced, including the greens of the onions

Method

1 Scrub the potatoes clean then bake the potatoes using your favorite method, either oven or microwave. If using an oven, rub with olive oil and bake in a 400°F oven for about an hour until the potatoes are cooked through and give a little when pressed. If using a microwave, rub all over with olive oil and cook on the high setting for about 5 minutes per potato. I have found that baking the potatoes in a conventional oven yields potatoes that are easier to work with (cut and scoop out), the potato seems to adhere to the skins a little better, but there is hardly a discernible difference in the final product.
2 While the potatoes are cooking, cook the bacon strips in a frying pan on medium low heat for 10 to 15 minutes, or until crisp. Drain on paper towels. Let cool. Crumble.
potato-skins-1.jpg potato-skins-2.jpg
3 Remove the potatoes from the oven and let cool enough to handle. Cut in half horizontally. Use a spoon to carefully scoop out the insides, reserving the scooped potatoes for another use, leaving about 1/4 of an inch of potato on the skin.
Increase the heat of the oven to 450°F. Brush or rub canola oil (or another high smoke point oil) all over the potato skins, outside and in. Sprinkle with salt. Place on a baking rack in a roasting pan (don't use a cookie sheet, it will warp, use a roasting pan or broiler pan that can take the heat). Cook for 10 minutes on one side, then flip the skins over and cook for another 10 minutes. Remove from oven and let cool enough to handle.
potato-skins-3.jpg potato-skins-4.jpg
4 Arrange the potato skins skin-side down on the roasting pan or rack. Sprinkle the insides with freshly ground black pepper, cheddar cheese, and crumbled bacon. Return to the oven. Broil for an additional 2 minutes, or until the cheese is bubbly. Remove from oven. Use tongs to place skins on a serving plate. Add a dollop of sour cream to each skin, sprinkle with green onions.
Serve immediately. Serves 4 to 6.


Simply Recipes http://simplyrecipes.com

Sunday, July 24, 2011

A twist on banana muffins

If your house is anything like mine, you probably have a few sad bananas lying around.  I went looking for a new recipe, mostly because I didn't have any milk in the house yesterday morning, and stumbled on this great recipe for Chocolate chip banana muffins.  Not only did the recipe include chocolate chips, but it also had some cocoa powder in the mix.  I just had to try them.  Let me tell you, this is a fantastic recipe.  I substituted vegetable oil for the sunflower oil listed in the original recipe, but other than that, I followed it to the letter.  We've been snacking on them this weekend and I think they will also be good for our breakfasts on the go during the school year.  Ok - go preheat the oven and give these a try.  Trust me, you're going to love them!   

Ingredients:
1 1/2 cups mashed bananas
2/3 cup vegetable oil
1 egg, beaten
1 1/2 teaspoons vanilla extract
2 cups all-purpose flour
1/2 cup white sugar
2 tablespoons unsweetened cocoa
powder
1 tablespoon baking powder
1/2 teaspoon salt
1 cup semisweet chocolate chips
Directions:
1. Preheat oven to 425 degrees F (220 degrees C). Lightly grease a 12-cup muffin tin.
2. In a medium bowl blend the banana, oil, egg and vanilla together.
3. In a large bowl, combine the flour, sugar, cocoa, baking powder and salt. Stir in the banana mixture until just blended. Fold in the chocolate chips. Spoon the batter into the prepared muffin tin, filling 3/4 full.
4. Bake in the preheated oven for 15 to 20 minutes. Remove muffins to a wire rack to cool completely.
ALL RIGHTS RESERVED © 2011 Allrecipes.com Printed from Allrecipes.com 7/24/2011
 

Saturday, July 23, 2011

Weekend Warrior

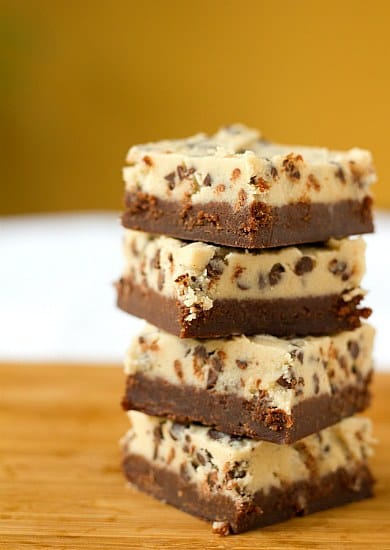
The rest of my week turned out to be extremely hectic.  And well, truth be told, La Finca, my favorite Mexican restaurant, ended up cooking me dinner last night.  The weekend though is typically my time to recharge my batteries, plan meals for the upcoming week, and go grocery shopping (which I really love to do!)  I was searching for some new recipes this morning when I stumbled onto this recipe that is a mix of chocolate chip cookie dough and brownies.  Um, yummo!  I just have to give it a try and I couldn't resist sharing it with you.  Leave a comment to let me know if all of you "weekend warriors" have a chance to whip up your favorite dishes or try something new.  I highly suggest trying out the Chocolate Chip Cookie Dough Brownies!        

Wednesday, July 20, 2011

Corn salsa

 I'm back! - from my work conference that is.   I had a really good time and learned lots of new stuff but I missed my family (and cooking my own food) like crazy cakes.  In order to help our little guys eat dinner better, we've been letting the boys each pick a meal for the menu that week.  They are always so proud of their choices and tonight was Braeden's choice, bean tacos.  Bean tacos are made with flour tortillas, refried beans from a can, and plenty of shredded cheddar cheese.  Absolutely nothing fancy, but surprisingly good eats.  To go with it I really wanted guacamole, but I didn't have any avocados.  However, I had all the fixings for homemade pico and two ears of corn.  So I got to work dicing and tasting.  Initially, I thought this corn salsa would be good with tortilla chips, not so much, but it was FANTASTIC on our bean tacos.  Well, Dusty was scooping it up with chips, the spoon, whatever he could grab.  :) And can you tell corn was on sale this week?  I love a good deal on food as much as I do trying out a new recipe!  Oh, I have one more recipe with grilled corn I'm dying to try but whip up some corn salsa for yourself and let me know what you think.  Do you like it with chips?  Or on your favorite Tex-Mex food item?    

Corn Salsa
2 large roma tomatoes - diced
1/2 of a small onion - diced
1 jalapeno - diced
2 ears of corn - grilled and cut off the cob
the juice from one lemon
cilantro - diced
salt & cumin - to taste

Monday, July 18, 2011

Creamy corn dip

Today, I whipped up a quick lunch before heading out of town for a work conference.  I shudder to think about the high-sugar crazy foods my boys will be eating while I'm lined up eating cafeteria food.  But, boys will be boys and I know they will enjoy it.  And I saw biscuits with sausage gravy on the menu board for breakfast in the morning. 

Anyways, I digress, so we didn't have much at the house, a half an ear of roasted corn, some sour cream, and frozen chicken quesadillas.  This recipe is an adaptation of a yummy dip from one of my old co-workers husbands, Raymond.  It was super yummy and it really jazzed up an otherwise ho-hum lunch.  This recipe could easily be doubled/tripled to feed more people.  And I hope you like it too!

1/2 cup sour cream
1/2 cup mayonaise
1/4 cup shredded cheddar cheese
1 ear of corn - roasted and cut off of the cob
1 jalapeno - seeded and diced
cilantro - chopped
salt and pepper to taste

Mix all ingredients in a bowl.  Serve with chips.  What are you waiting for! Dig in.  :)
 

Sunday, July 17, 2011

Spaghetti night

I remember when my mom would strip me down to my underwear, wrap a table cloth around me, and sit me down for spaghetti. In my house, my little guys (Braeden & Jackson) are nearly always running around in their underwear so no worries there! But really, I LOVE spaghetti. It's probably my favorite non-Mexican food. And truth be told, this was one of the first family recipes I began to tinker with. See, I've never been a very good rule follower when it comes to cooking. This really drives my mom crazy when she just wants to eat "our spaghetti" sauce and I'm in a spice-it-up mood. So, tonight for dinner at our house it was spaghetti and meat sauce. And rather than plan old garlic bread, I thought I would change it up a bit. The tomatoes were literally talking to me at HEB this morning. (Does food talk to you too?) So this is the link for the bruschetta recipe that I found and I just kind of went from there. At first I thought I would make a very traditional bruschetta: tomatoes, basil, olive oil, garlic, and yummy bread.  But then I found this recipe and I loved the twist with the bubbly cheese.  So we tried them both.  Dusty and I loved the cheesy one, warm and bubbly.  The traditional one was great too.  The boys took one look at the tomatoes and ran for the hills, though they did like the crustini.  Spice up your family's spaghetti night by trying your hand at bruschetta (traditional or cheesy) and let me know how it turns out.

My love affair with food

I am well aware that for some people food is just that, food.  But for me, food is so much more.  It can transport me back to important events, or places, or help create a special feeling.  I definitely have a love affair with food.  As a wife and mom, food is one of those special ways that I spoil my family.  I love to watch my husband scarf down a great dinner or hear my little boys ask for seconds.  It doesn't have to be fancy; I'm in love with some simple dishes too.  But it is always served with a heaping scoop of love.  Okay - so maybe that sounds a little corny (or a lot!) but I really do love to cook.  Many of your know that my husband, the bestest man in the whole wide world, loves to blog about all of our family's adventures.  However, I recently stumbled onto another blog, the Pioneer Woman, and thought how much I loved to read along with her food adventures.  In a way, it helped me find my voice.  With this blog, I'm going to share about my dinner chronicles, you know it's not always easy to cook a great meal each night when you're a working mom.  I'll post some recipes, share my triumphs and failures, and talk about the love/events/emotions around the food.  I hope you're excited because I know I am!!!