The honest chronicles of a working mom who loves food and loves cooking for her family.
Showing posts with label dessert. Show all posts
Saturday, June 30, 2012
Beignets
Dusty and I took our first jobs after college in New Orleans. We absolutely LOVED it there: the people (especially our friends at St. John), the food, Mardi Gras, and so much more. We lived there for just over 15 months until Hurricane Katrina relocated us back to Houston. One of the new foods we tried and fell in love with were beignets. There was nothing like walking around in the French Quarter and stopping into Cafe du Monde for a cup of coffee and an order of these sweet, fried, delicious treats. When we moved back to Houston, I tried everything to recreate the experience at home. I've used the box mix you can find in the grocery stores and several other recipes. But this is hands-down the best recipe I've ever found. I prepared the dough in the bread machine but you could adapt this recipe to be made without it too by blooming the yeast first and then adding the remaining ingredients.
Ingredients:
2/3 cup milk
1/4 water
1 egg
1 Tbls butter
1 tsp vanilla
3 cups flour
1/4 cup sugar
3/4 tsp salt
1 1/4 tsp active dry yeast
cooking oil for frying
sifted powdered sugar for dusting
Preparation Instructions:
1. Add all ingredients (except the oil and powdered sugar) in the order listed to the bread machine. Select the 1 1/2 pound dough cycle. When the cycle is complete, remove dough from the machine. Punch down. Cover and let it rest for 10 minutes.
2. Divide the dough in half. On a lightly floured surface, roll each portion into a 9-inch square. Cut into 16 squares.
3. Fry dough squares (2 or 3 at a time) in hot oil (at 375 degrees) for 1 to 2 minutes or until golden brown, turning once. Using a slotted spoon, removed from oil and drain on paper towels. Sprinkle with powdered sugar.
adapted from Better Homes & Gardens: The Complete Guide to Bread Machine Baking
Friday, June 29, 2012
Funfetti Sandwich Cookies
From the first minute that I saw this recipe, I just knew I HAD to try it. You see, I LOVE sprinkles. Not in the childish, just add a couple to the top of your ice cream, way. No, no, that's not nearly enough sprinkles. Instead, my mom (and now Dusty) have always teased me that I need some ice cream with my sprinkles. I love Funfetti cake mix too. This recipe was really simple and turned out deliciously! Braeden and Jackson agreed with me that this was one of our new FAVORITE cookie recipes and they will definitely be showing up in our cookie jar quite a bit. So grab a mixing bowl and these ingredients and get to work. I guarantee you're going to love these cookies too!
Ingredients:
1 cup unsalted butter, at room temperature
1 1/4 cups sugar
2 teaspoons vanilla extract
1 teaspoon almond extract
1 large egg
2 1/2 cups Gold Medal all-purpose flour
1/4 cup cornstarch
3/4 teaspoons baking soda
1/2 teaspoon salt
1/2 cup Red, White & Blue Jimmie sprinkles
2 tablespoons Red, White & Blue nonpareil sprinkles
1 1/4 cups sugar
2 teaspoons vanilla extract
1 teaspoon almond extract
1 large egg
2 1/2 cups Gold Medal all-purpose flour
1/4 cup cornstarch
3/4 teaspoons baking soda
1/2 teaspoon salt
1/2 cup Red, White & Blue Jimmie sprinkles
2 tablespoons Red, White & Blue nonpareil sprinkles
For the Buttercream Frosting:
1 cup of unsalted butter, at room temperature
3 1/2 cups powdered sugar, sifted
1/8 teaspoon of salt
1 tablespoon vanilla extract
1/4 teaspoon almond extract
2 tablespoons heavy cream
Blue food coloring (I used powdered)
3 1/2 cups powdered sugar, sifted
1/8 teaspoon of salt
1 tablespoon vanilla extract
1/4 teaspoon almond extract
2 tablespoons heavy cream
Blue food coloring (I used powdered)
Preparation Instructions:
1. Preheat the oven to 375 degrees F. Line a large baking sheet with a Silpat or parchment paper. Set aside.
2. Using a mixer, cream the butter and sugar together for about 2 minutes, until light and fluffy. Add the vanilla extract, almond extract, and egg. Beat until well combined.
3. In a separate bowl, sift the flour, cornstarch, baking soda, and salt. Slowly add the flour mixture to the butter mixture, and mix on low speed until ingredients are combined. Gently mix in the sprinkles. Don't over mix or the sprinkles will bleed into the dough.
4. Form cookie dough into small balls, about a teaspoon in size. Place cookie dough balls on the prepared baking sheet. Bake for 8-10 minutes or until the cookies are light golden brown around the edges. The cookies will harden as the cool, so don't over bake.
5. Cool cookies on a wire rack.
6. While the cookies are cooking, make the buttercream frosting. In the bowl of a stand mixer, beat the butter at medium speed until nice and smooth, using the paddle attachment. Turn the mixer down to low and slowly add the powdered sugar. Once sugar is fully incorporated turn the mixer up to medium speed and add in the salt and vanilla extract. Add the heavy cream and mix for 3 minutes or until frosting is smooth. Check the consistancy of the frosting, if it is to loose, add more powdered sugar. If it is too stiff, add a little more cream. Mix in food coloring and beat until you have your desired color.
7. To make the sandwich cookies, pipe (using a pastry bag or plastic bag) small dollops of frosting on a cookie and sandwich another cookie on top. Store cookies in an air-tight container for up to 3 days.
Check out the Fourth of July version of this recipe @ http://www.twopeasandtheirpod.com/red-white-blue-funfetti-sandwich-cookies/
Friday, June 22, 2012
Chex Muddy Buddies
Okay - I'm on a total sweet kick! :) I had a couple of boxes of Wheat Chex that were going to expire in mid-July. So I checked the pantry and I had all of the ingredients to whip up a batch of Muddy Buddies or Puppy Chow, as my husband calls it. I've had Muddy Buddies with Corn Chex and Rice Chex but my absolute favorite kind is made with Wheat Chex. The Wheat Chex makes this yummy treat so crunchy and delicious!!! It took just a few minutes to prepare this recipe so grab a box or two of Chex, some chocolate chips and head to the kitchen. Your sweet tooth will definitely thank you!!!
Ingredients:
9 cups Corn Chex®, Rice Chex®, Wheat Chex® or Chocolate Chex® cereal (or combination)
1 cup semisweet chocolate chips
1/2 cup peanut butter
1/4 cup butter
1 tsp vanilla
1 1/2 cups powdered sugar
Preparation Instructions:
1. In a large bowl, measure out 9 cups of cereal. Set aside.
2. In a 1 quart mixing bowl, combine chocolate chips, peanut butter, and butter. Microwave on high for 1 minute. Stir. Microwave for 30 more seconds or until smooth. Stir and then pour over cereal. And mix to coat cereal evenly.
3. In a gallon-sized Ziploc bag, add half of the cereal mixture and half of the powdered sugar (3/4 cup). Shake to coat all of the pieces. Spread on waxed paper to cool. Repeat with the remaining cereal mixture and powdered sugar. When completely cool, store in an airtight container in the refrigerator.
Adapted from: http://www.bettycrocker.com/recipes/chex-muddy-buddies/92e4756c-abc1-452a-9b2c-dd124d858050
Thursday, June 21, 2012
Brown Sugar Pecan Cupcakes with Caramel Frosting

Ingredients:
For the Cupcakes:
- Nonstick vegetable oil spray
- 1 cup all purpose flour
- 1/2 cup cake flour
- 1/2 teaspoon baking powder
- 1/2 teaspoon baking soda
- 1/2 teaspoon fine sea salt
- 1 1/4 cups coarsely chopped toasted pecans
- 1/2 cup (1 stick) unsalted butter, room temperature
- 1 cup (packed) golden brown sugar
- 2 large eggs, room temperature
- 1/3 cup sour cream
- 1 teaspoon vanilla extract
For the Frosting:
- 1 cup sugar
- 1/4 cup water
- 1/2 cup heavy whipping cream
- 2 large egg yolks
- 1/2 cup (1 stick) unsalted butter, room temperature
- 1/8 teaspoon fine sea salt
- 1 cup powdered sugar, sifted
- 1 cup coarsely chopped toasted pecans
- Preparation Instructions:For cupcakes:
Put rack in bottom third of oven; preheat to 350°F. Spray 12-cup muffin pan with nonstick spray; line with muffin cups.Whisk both flours, baking powder, baking soda, and sea salt in medium bowl. Stir in chopped pecans. Beat butter in large bowl until smooth. Add brown sugar; beat until light and fluffy, about 2 minutes. Add eggs 1 at a time, beating to blend between additions. Beat in sour cream and vanilla. Add dry ingredients; beat on low speed just to blend. Divide batter among muffin cups.Bake cupcakes until tester inserted into center comes out clean, about 23 minutes. Cool in pan on rack 15 minutes. Transfer to rack; cool. DO AHEAD: Can be made 8 hours ahead. Cover; store at room temperature.For frosting:
Stir sugar and 1/4 cup water in medium saucepan over medium-low heat until sugar dissolves. Increase heat to medium-high; boil until syrup turns deep amber, swirling pan and brushing down sides with wet pastry brush, 6 to 7 minutes. Remove from heat; add cream (mixture will bubble up). Stir over low heat until caramel bits dissolve. Whisk egg yolks in medium bowl. Very gradually whisk hot caramel into yolks. Cool to room temperature.Using electric mixer, beat butter and salt in large bowl until smooth. Beat in caramel. Add powdered sugar and beat until smooth. Let stand at room temperature until thick enough to spread, about 1 hour.Spread frosting over cupcakes. Place pecans on plate. Roll edges of cupcakes in nuts. DO AHEAD: Can be made 8 hours ahead. Store airtight at room temperature.
Taken from: http://www.epicurious.com/recipes/food/views/Brown-Sugar-Pecan-Cupcakes-with-Caramel-Frosting-355851#ixzz1yRWpJZUx
Monday, June 18, 2012
Watermelon Granita
Okay - so it's been a while, a long while since I've blogged. You see, I've been doing a different kind of baking. On June 3rd, I delievered our third child, a sweet baby girl, named Stella. We are so blessed!!! But it wasn't an easy pregnancy by any stretch of the imagination. And for the last nine months (well, eight, I always deliver early) we have eaten a lot of pre-packaged frozen food. Dusty makes a great freezer pizza. :)
But I'm not pregnant any more, and I have the summer off with my family, and I'm so ready to get back to cooking and blogging. I just downloaded Pioneer Woman's new cookbook to my Nook and I am totally in LOVE!!!! It's just amazing. One of the included recipes in her book is for Watermelon Granita. And we had a TON of cut up watermelon that just wasn't getting eaten in our fridge. So I picked up 2 limes from the grocery store and got to work on this delicious new recipe.
Ingredients:
8 cups of seedless watermelon, cut in to chunks
Juice of 2 limes
1/2 cup sugar
Preparation Instructions:
1. Use about half of a seedless watermelon. Cut into chunks and set aside.
2. Juice 2 limes
3. Add lime juice, sugar, and as much watermelon as will fit to the blender. Process until completely smooth. My blender is VERY small so I would pour almost all of the pureed watermelon into my 13x9 dish, reserving just a small amount in the blender container to help the next addition of watermelon to puree. Keep going with this process until all of the watermelon is pureed and added to the 13x9 dish.
4. Cover dish and place in the freezer. After 3 hours, remove from the freezer and gently scrape the top layer with a fork. Repeat every few hours until all of the mixture has been scraped.
5. EAT this delicious summer treat!!!!!
Check out her recipe and great photos here (my photo does not do this recipe justice): http://thepioneerwoman.com/cooking/2011/07/watermelon-granita/
Sunday, January 1, 2012
Chocolate glaze
My mom has been out of town for the last week, dropping my little brother off at college in Nebraska. My brother, Adam, is nine years younger than me, and I love him so much! He was accepted this fall into the business program at the University of Nebraska - Lincoln. He's going to do a fantastic job, but we're all going to miss his, ah wit and charm, so very much. To welcome mom back, we picked her up from the airport and had a delicious dinner ready for her.
We tried out a new chili recipe (post coming later) and made a yellow cake with chocolate frosting. Yummo! Yellow cake with chocolate frosting is my absolute favorite. But truth be told, the cake came from a box, but I still count it as homemade because I had to mix and bake it myself. :) I didn't want a ton of big, puffy, chocolate frosting so I went searching for a simple chocolate glaze to cover the cake. This recipe came together so easily and was super delicious!!!
Ingredients:
3/4 cup semisweet chocolate chips
3 tablespoons butter
1 tablespoon light corn syrup
1/4 teaspoon vanilla extract
Preparation Instructions:
We tried out a new chili recipe (post coming later) and made a yellow cake with chocolate frosting. Yummo! Yellow cake with chocolate frosting is my absolute favorite. But truth be told, the cake came from a box, but I still count it as homemade because I had to mix and bake it myself. :) I didn't want a ton of big, puffy, chocolate frosting so I went searching for a simple chocolate glaze to cover the cake. This recipe came together so easily and was super delicious!!!
Ingredients:
3/4 cup semisweet chocolate chips
3 tablespoons butter
1 tablespoon light corn syrup
1/4 teaspoon vanilla extract
Preparation Instructions:
- In a double boiler over hot, but not boiling water, combine chocolate chips, butter, and corn syrup. Stir until chips are melted and mixture is smooth. Remove from heat. Then add vanilla.
- Spread warm glaze over top of cake, letting it drizzle down the sides.
- Add sprinkles!!! Because no cake is complete without sprinkles. :)
- Hide from your husband - mine kept trying to convince me to cut him a slice of the cake before dinner so that he could assure quality control.
Sunday, July 31, 2011
Red Velvet Brownies
I have had an insatiable sweet tooth lately. But, I do not bake. Baking is precise. Not only that but you have to follow the steps exactly, you have to measure everything, and it's just not my cup of tea. But my fantastic husband, Dusty, does bake. Dusty is lots of things, patient, kind, supportive, as well as being a great baker! So he's making a guest appearance on the blog with red velvet brownies. I've been searching for a good red velvet brownie recipe for the better part of the week. The initial recipe that sent me on the hunt had a good brownie base and had a cream cheese icing. I don't know why, but it just didn't scream yum to me. So I went searching some more. Other recipes just had a stand alone brownie with lots of red food dye. Again, just wasn't what I was looking for. Then this morning, I found it! This recipe had a delicious, cakey red velvet brownie base. And it was swirled with cream cheesyness goodness (yes, that's a word). I showed Dusty the recipe and declared that he just HAD to make them for me. I ran out to get cream cheese and red food dye while Dusty looked over the recipe. Lots of measuring, mixing, pan-greasing, and layering ensued while I watched from the sidelines giving "helpful suggestions" all along the way. I am a horrible back-seat baker. :( We omitted the walnuts from the original recipe and cooked them for 33 minutes rather than the 30 minutes. Me & Dusty and the boys dove into these as soon as we snapped the pictures and they are so yummy! If red velvet is a favorite of yours, you will want to try these brownies.
And I got to thinking about a few questions... Do you have split cooking/baking responsibilities in your house? Do you prefer cooking over baking too?
Butter an 8 by 8-inch baking pan, and set aside.
Brownie layer: In a saucepan on medium heat melt the butter. Remove the butter to a large bowl and add the sugar, vanilla, cocoa powder, salt, food coloring, and vinegar, in that order, mixing between additions. Whisk the eggs in a small bowl and stir it into the cocoa mix. Fold in the flour until lightly combined. Stir in the walnuts and pour the batter into the prepared baking pan, saving 1/4 cup of the batter for the top.
Cream cheese layer: Blend together the cream cheese, sugar, egg, and vanilla in a medium bowl. Gently spread the cream cheese layer on top of the brownie batter in the pan. Dollop the remaining brownie batter over the cream cheese layer. Using a skewer or the tip of a knife, drag the tip through the cream cheese mixture to create a swirl pattern. Bake the brownies for 30 minutes. Remove to a cooling rack and allow them to cool completely before cutting.
http://www.foodnetwork.com/recipes/sunny-anderson/red-velvet-swirl-brownies-recipe/index.html
And I got to thinking about a few questions... Do you have split cooking/baking responsibilities in your house? Do you prefer cooking over baking too?
Ingredients
- 1 tablespoon unsalted butter, for pan
Red Velvet Brownie Layer:
- 1 stick unsalted butter
- 1 cup sugar
- 1 teaspoon vanilla extract
- 1/4 cup cocoa powder
- Pinch salt
- 1 tablespoon red food coloring
- 1 teaspoon vinegar
- 2 eggs
- 3/4 cup all-purpose flour
- 1/4 cup chopped toasted walnuts
Cream Cheese Layer:
- 8 ounces cream cheese, softened
- 1/4 cup sugar
- 1 egg
- 1/8 teaspoon vanilla extract
- Special equipment: 8 by 8-inch baking pan
Directions
Preheat the oven to 350 degrees F.
Butter an 8 by 8-inch baking pan, and set aside.
Brownie layer: In a saucepan on medium heat melt the butter. Remove the butter to a large bowl and add the sugar, vanilla, cocoa powder, salt, food coloring, and vinegar, in that order, mixing between additions. Whisk the eggs in a small bowl and stir it into the cocoa mix. Fold in the flour until lightly combined. Stir in the walnuts and pour the batter into the prepared baking pan, saving 1/4 cup of the batter for the top.
Cream cheese layer: Blend together the cream cheese, sugar, egg, and vanilla in a medium bowl. Gently spread the cream cheese layer on top of the brownie batter in the pan. Dollop the remaining brownie batter over the cream cheese layer. Using a skewer or the tip of a knife, drag the tip through the cream cheese mixture to create a swirl pattern. Bake the brownies for 30 minutes. Remove to a cooling rack and allow them to cool completely before cutting.
http://www.foodnetwork.com/recipes/sunny-anderson/red-velvet-swirl-brownies-recipe/index.html
Saturday, July 23, 2011
Weekend Warrior
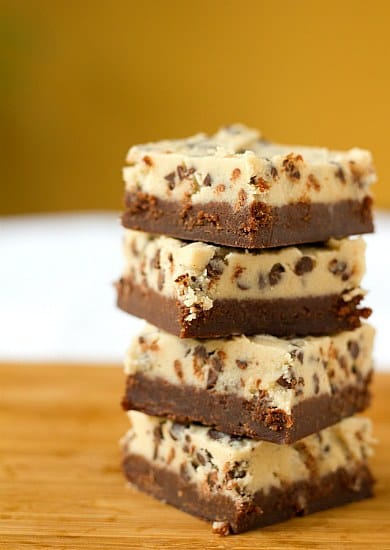
The rest of my week turned out to be extremely hectic. And well, truth be told, La Finca, my favorite Mexican restaurant, ended up cooking me dinner last night. The weekend though is typically my time to recharge my batteries, plan meals for the upcoming week, and go grocery shopping (which I really love to do!) I was searching for some new recipes this morning when I stumbled onto this recipe that is a mix of chocolate chip cookie dough and brownies. Um, yummo! I just have to give it a try and I couldn't resist sharing it with you. Leave a comment to let me know if all of you "weekend warriors" have a chance to whip up your favorite dishes or try something new. I highly suggest trying out the Chocolate Chip Cookie Dough Brownies!
Subscribe to:
Posts (Atom)